Quick and easy guide to set up Burd as a carrier in Webshipper
This guide takes you through a 5 step process.
- The carrier setup
- Creating the shipping rate
- Creating the Burd automation
- Contact Burd to go live
- Sending the first order
1. The carrier
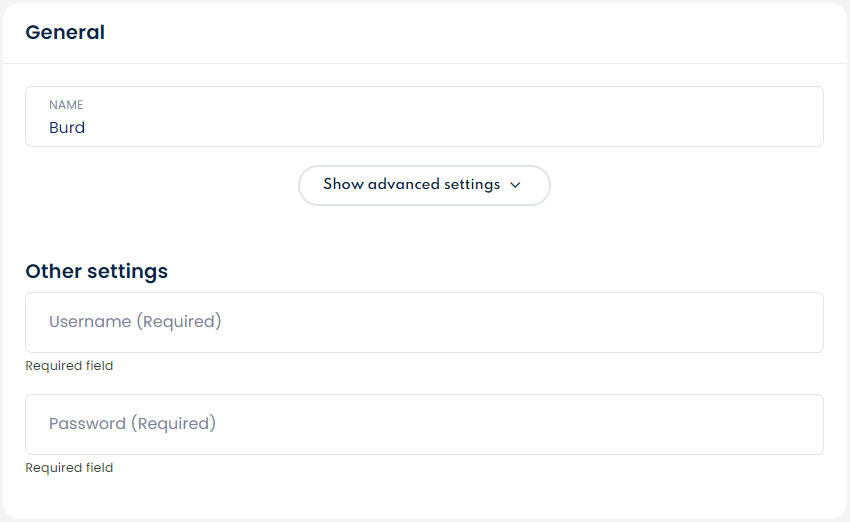
Click: Connect > Carriers > Create carrier > Input Username + API token from Burd

2. Create shipping rate for Burd
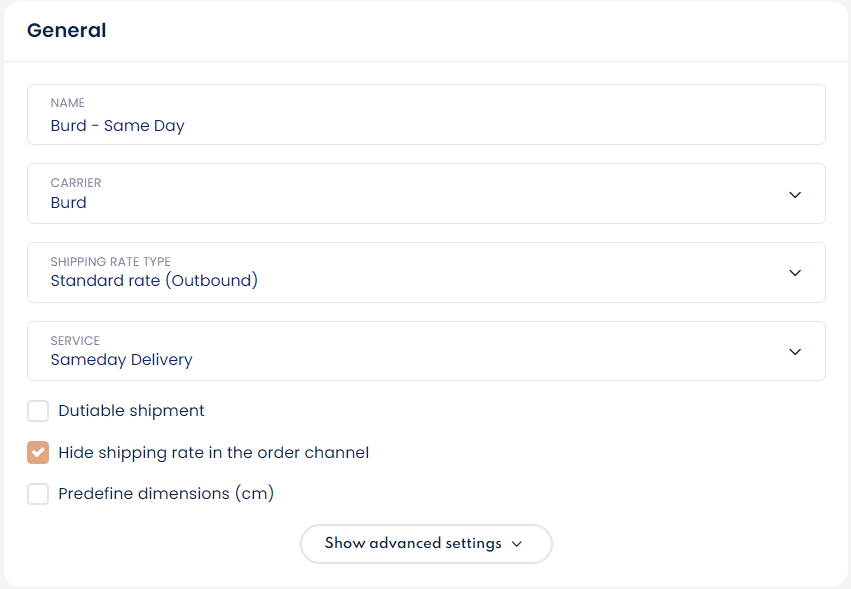
Click: Connect > Order channels > Select order channel > Create shipping rate.
- Enter the desired name of the rate
- Select Burd as a carrier
- Select standard shipping rate
- Select delivery service
- Check the box: "Hide shipping rate in the order channel"


Fill out the shipping rate as you normally would and define the method as you see fit and click "Create shipping rate".
PLUGIN NOTE:

If you are using the Burd plugin in Shopify or Woocommerce, you do NOT
need to enter a shipping price or any other conditions on the rate.

However, if you are NOT using the Burd plugin and do NOT have Shopify
or Wordpress, then please see this article on how to enter shipping rate
conditions.
how do i define rates from zip codes
Find the shipping rate ID:
You should now be back to the overview of all your shipping methods. Now hover your cursor over your newly created shipping method and see the last number in the URL showing. This is the shipping rate ID. In the example below, the ID = 11

This is important for the next step when creating your automation.
3. The Burd Workflow
So in order for Webshipper to lock on to the right zip codes and much more, you need to set up a workflow. If you do not have access to workflows, contact your account manager or Webshipper support.
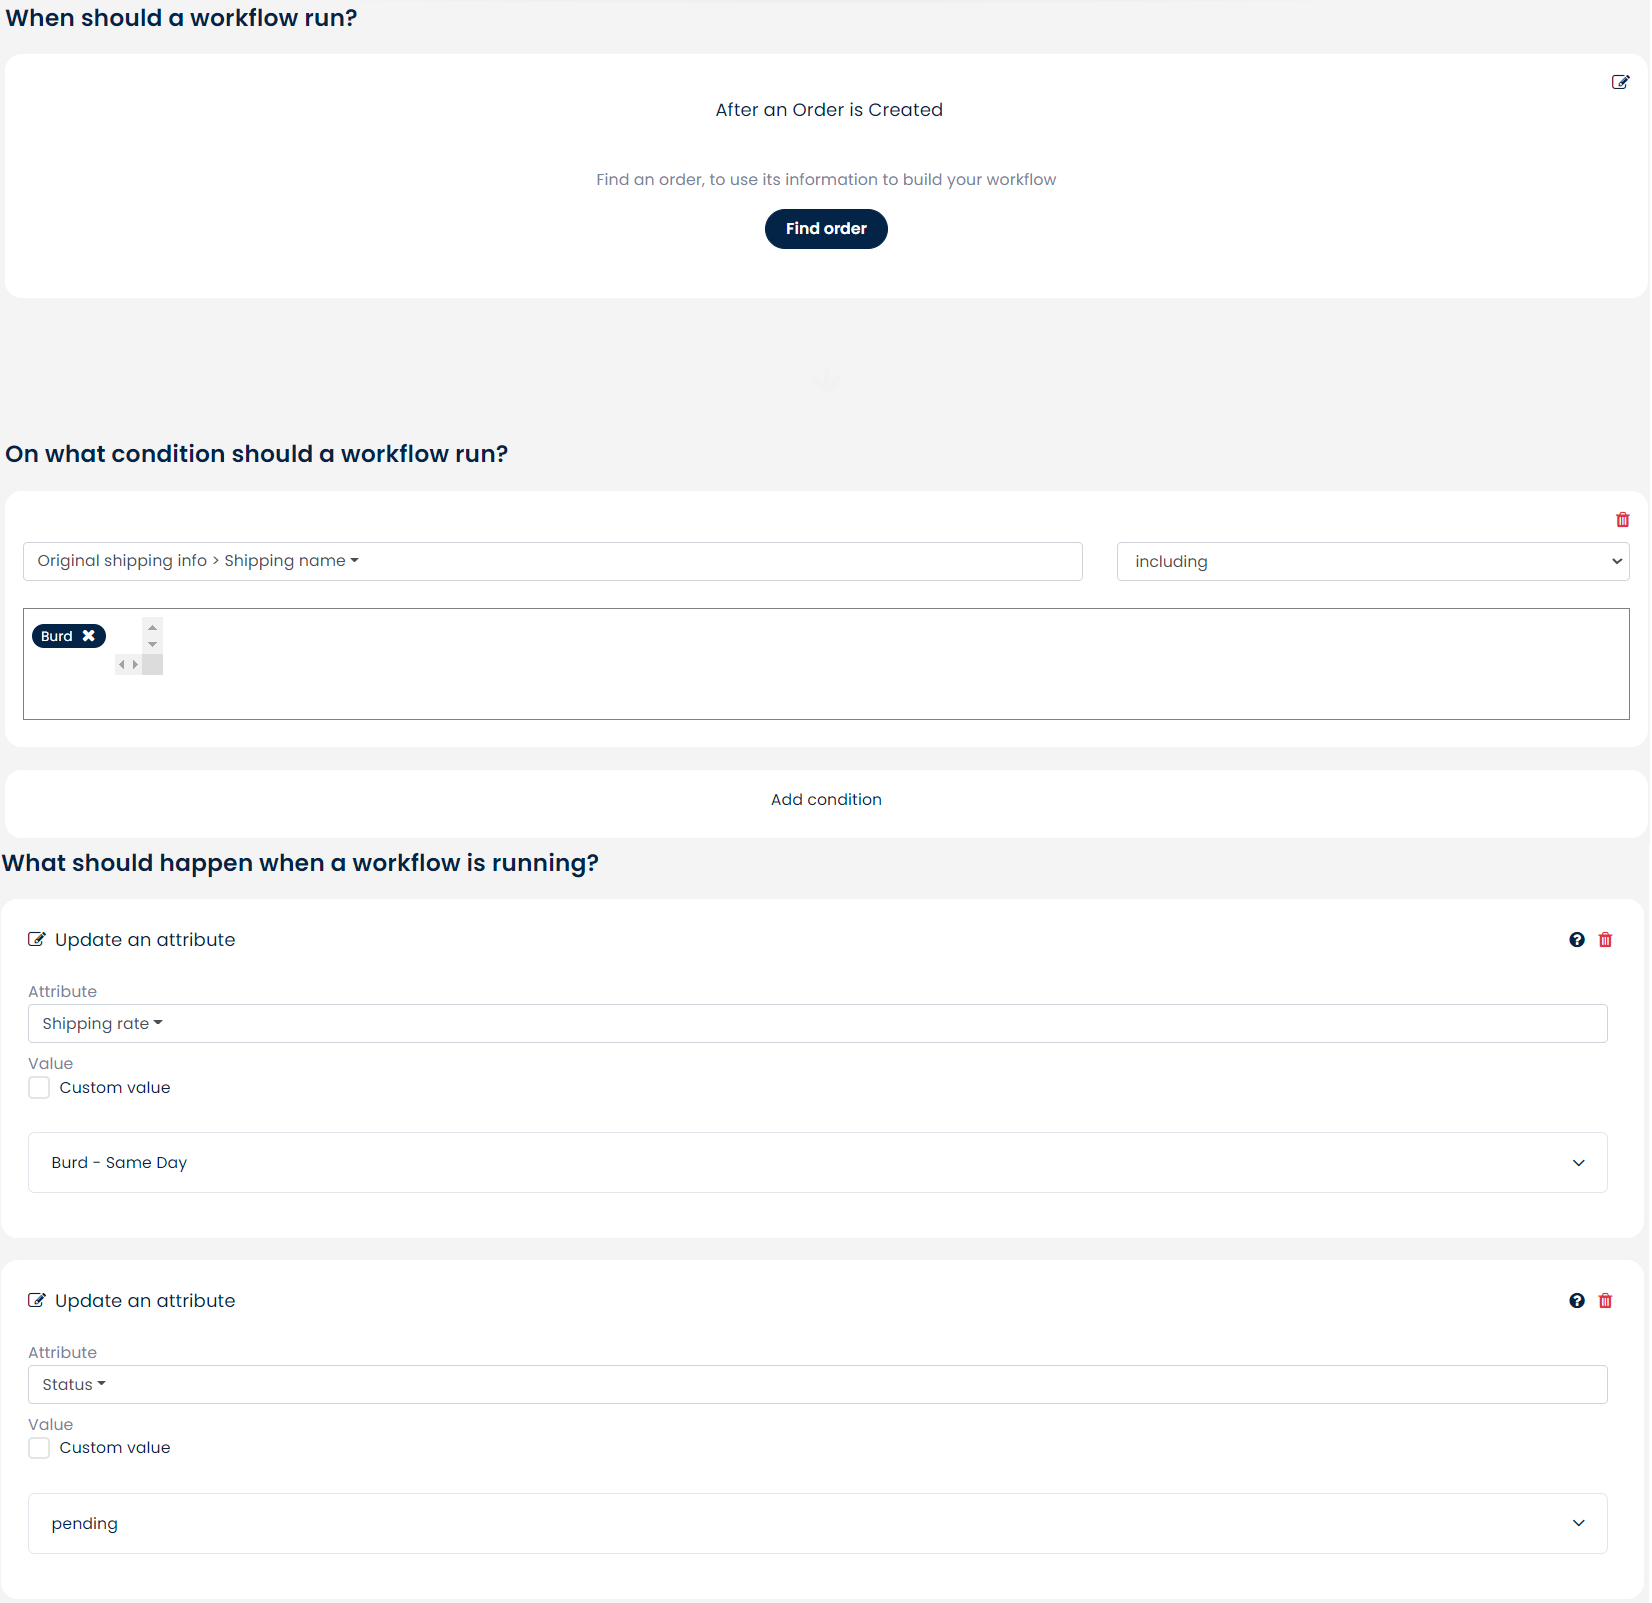
Navigate to Settings > Workflows > Create new
- Click "add trigger" and enter "After an order is created"
- Condition: (Comparison) Order > original shipping info > shipping name Includes "Burd"
- Action: (Update an attribute) Shipping rate ID
- Type in the shipping rate ID
- Action: (Update an attribute) attribute: Status
- Type in: pending
Well done, your workflow is now complete.

See the workflow in Danish here
4. Contact Burd to go live
Finally, you need to contact Burd and make sure they assist with the setup and activation of their plugin.
Web: https://burd.dk/
Call: +45 92 45 17 77
Email: support@burd.dk
5. Sending the first order
The first time you receive an order with Burd, it may say "Shipping rate missing" in the order overview. If it does not, the setup is complete, otherwise, you need to click "Add" in the right side of the screen.

A pop-up will appear and ask you which shipping rate the system should apply each time a Burd shipping comes into Webshipper. In this pop-up you need to select your new shipping rate in the dropdown and then check the box "Always use this shipping rate when Burd is selected".
Finally, press Send and voila you have now shipped your first order with Burd.

