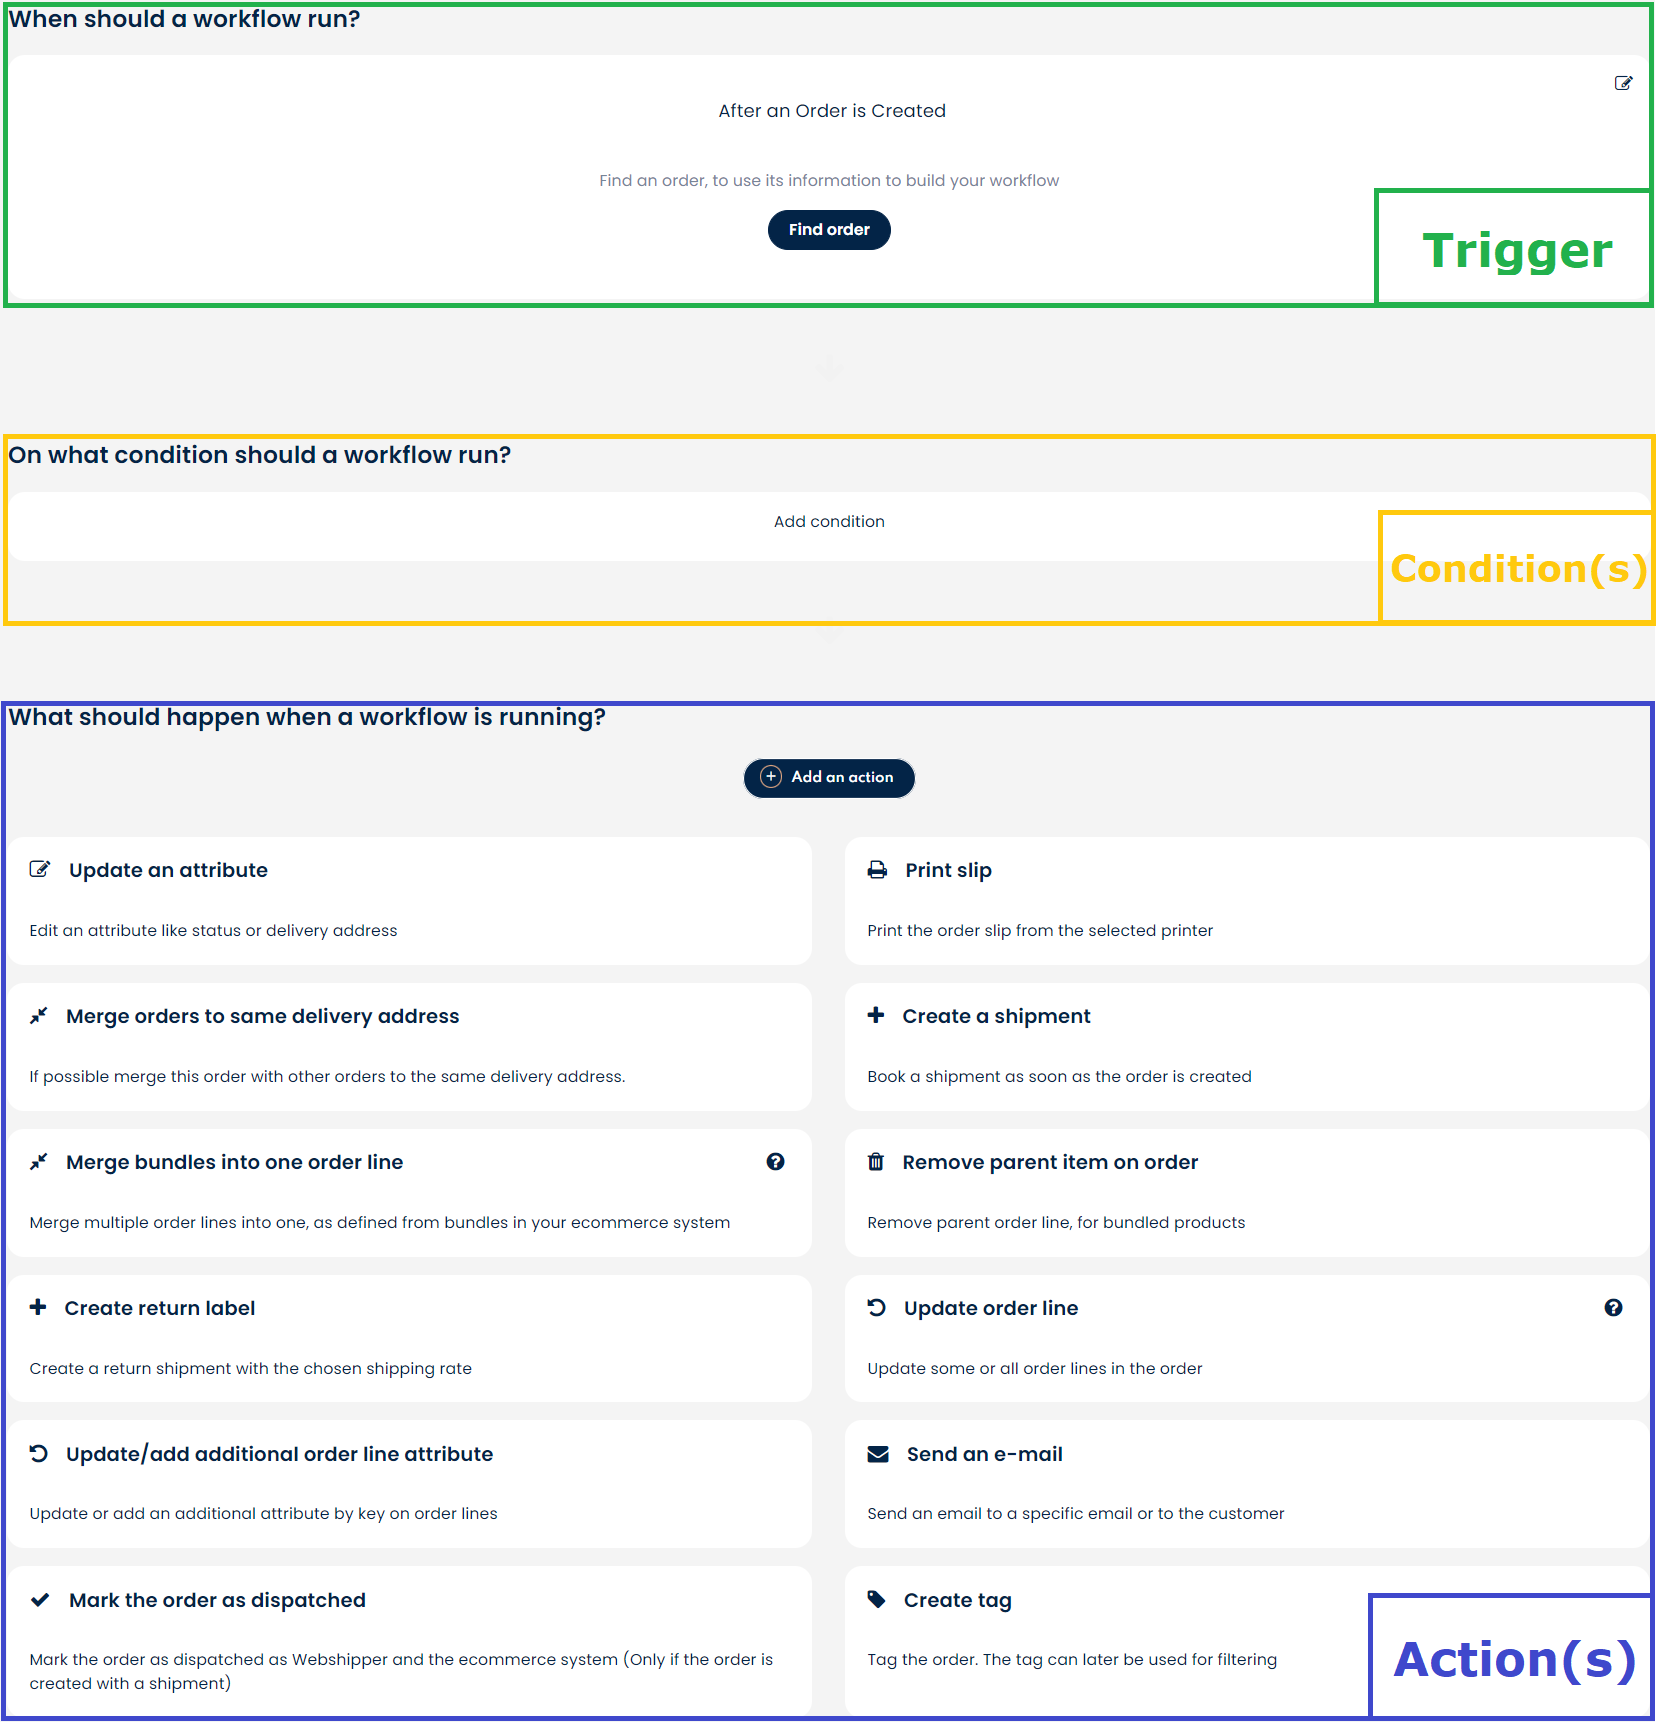
Workflows are a compelling way of automating various tasks in Webshipper. It can be configured to solve lots of different issues. Workflows are found in your Webshipper account under Settings > Workflows.
In short, workflows can be divided into a trigger, a condition, and one or more actions. Basically, the trigger is the condition that must be satisfied before the automation executes, the condition further specifies different rules that need to apply, and the action determines what will be done.
Trigger
The trigger consists of a trigger model, which currently can be when an order, a shipment or a report is created or updated.
Conditions
These are a list of rules (or conditions) that needs to be fulfilled for the workflow to proceed.
This can be useful if you only want the automation to apply to a specific order channel or only for orders in a particular country.
Actions
Actions specify the actual operations which are to be executed based on the trigger. Actions could, for example, be creating a shipment, a return label, updating data for any given model, etc. To get an overview of possible actions, please refer to the Webshipper interface - or other articles under the Workflow section.
Tons of possibilities
As we described at the beginning of this article, there are tons of options with automations.
We've made a few use cases for you to take a look at in the Workflows Section of our forum.
If you don't find what you are looking for, it should give you a better idea of how to set things up correctly.
Placeholders
If you are asked to input a placeholder, you can find a complete list of these by clicking here.
As always, our trusted support will be happy to help if you run into any issues.

