Let us take you through a few steps to set up the integration to your Dandomain
1) Create an API token in Dandomain
2) Create an order channel in Webshipper
1) Create an API token in Dandomain
- Sign in to your Dandomain store.
- Navigate to Indstillinger > Integration.
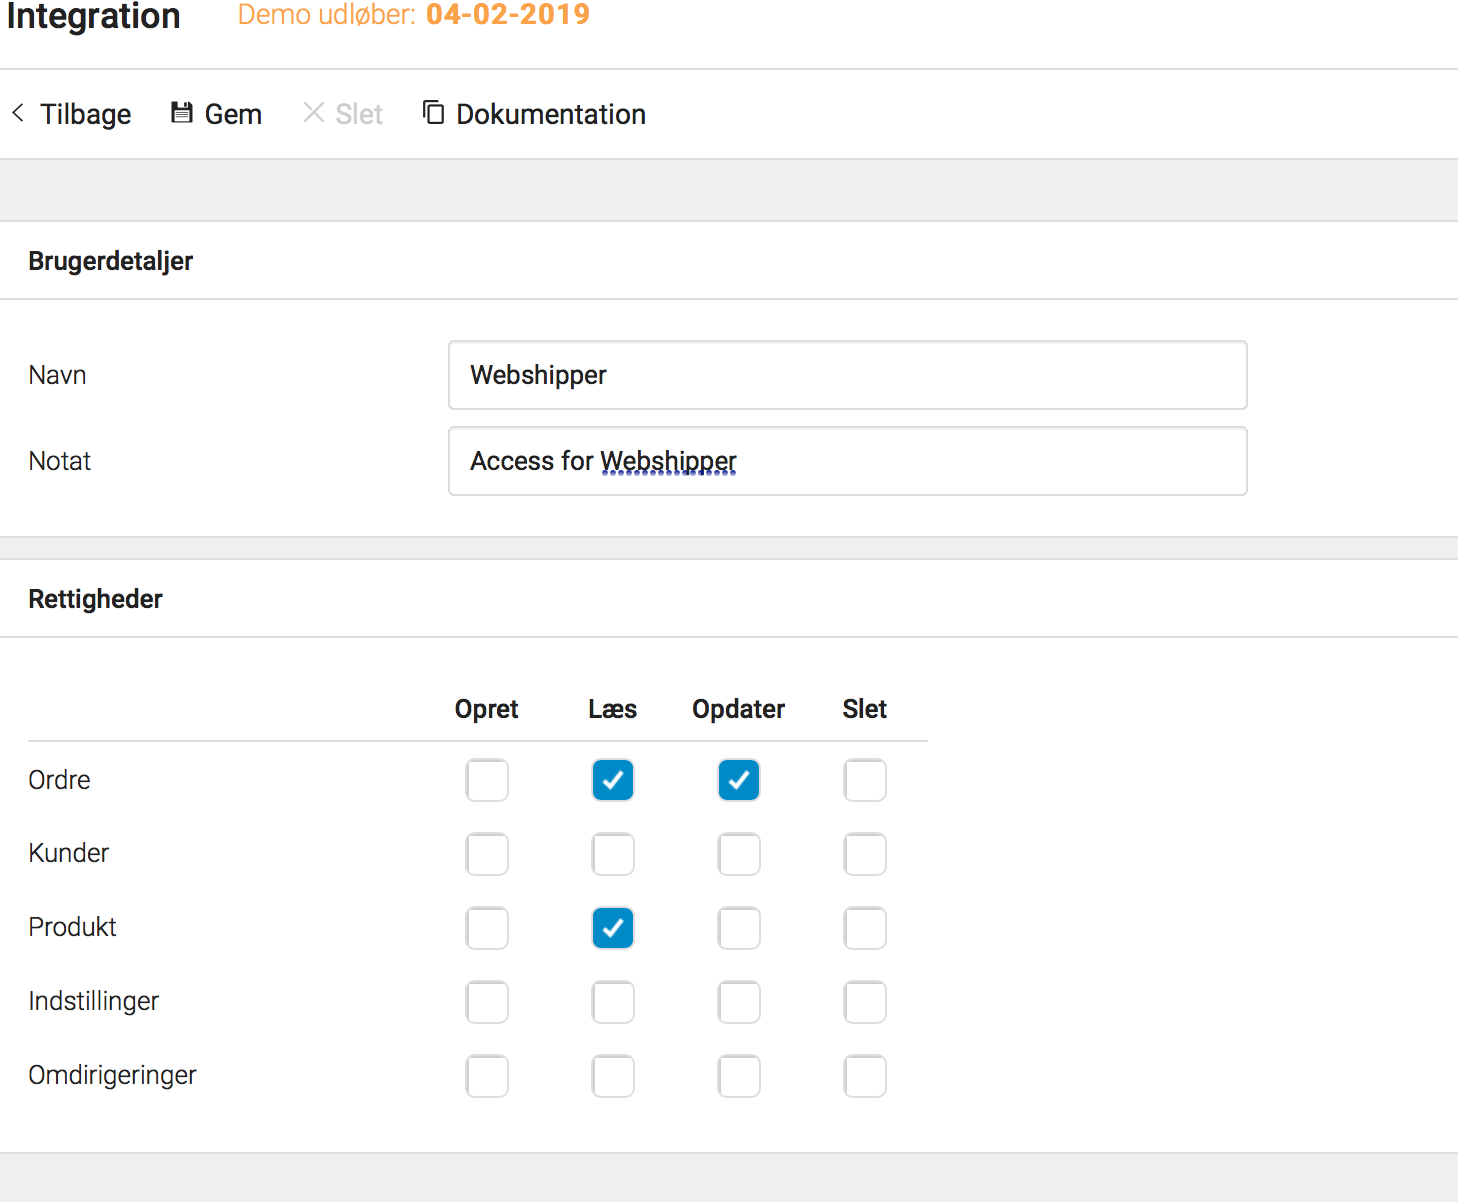
- Click Tilføj ny bruger and fill in the form as shown below.
- Save the API token, as it cannot be shown later.

2) Create an order channel in Webshipper
To set up the connection in Webshipper, follow the steps below.
- Navigate to Connect > Order channels > New order channel > Dandomain > Connect.

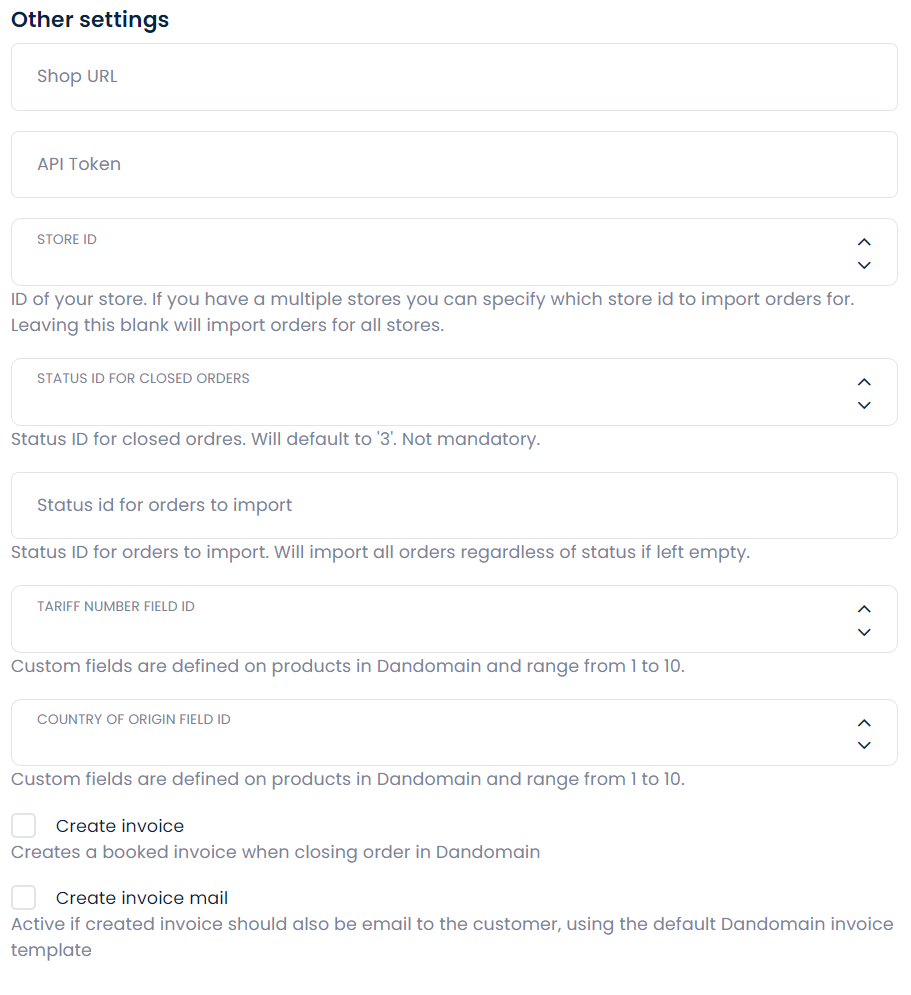
- Assign the attributes provided in the order channel form.

- Shop URL
The Shop URL is the URL of your Dandomain store. For example: https://webshipper.webshop8.dk - API Token
Which is the token you created earlier - Store ID (optional)
This is the ID of your Dandomain store. This is purely used to fetch location for products and is often not needed. If you need locations, please contact Dandomain to get your Store ID. - Status ID for closed orders
By default, Webshipper will change the order status to 'Sent' in Dandomain as long as fulfill automatically is enabled for the order channel. In the rare case, you want the status to be different; you can optionally assign another status ID. - Tariff number - Field number in Dandomain
- Country of origin - Field number in Dandomain
- Shop URL
- Finally, click Create order channel and you are all done and ready to get started setting up your rates.

