A quick introduction to getting started with orders and shipments.
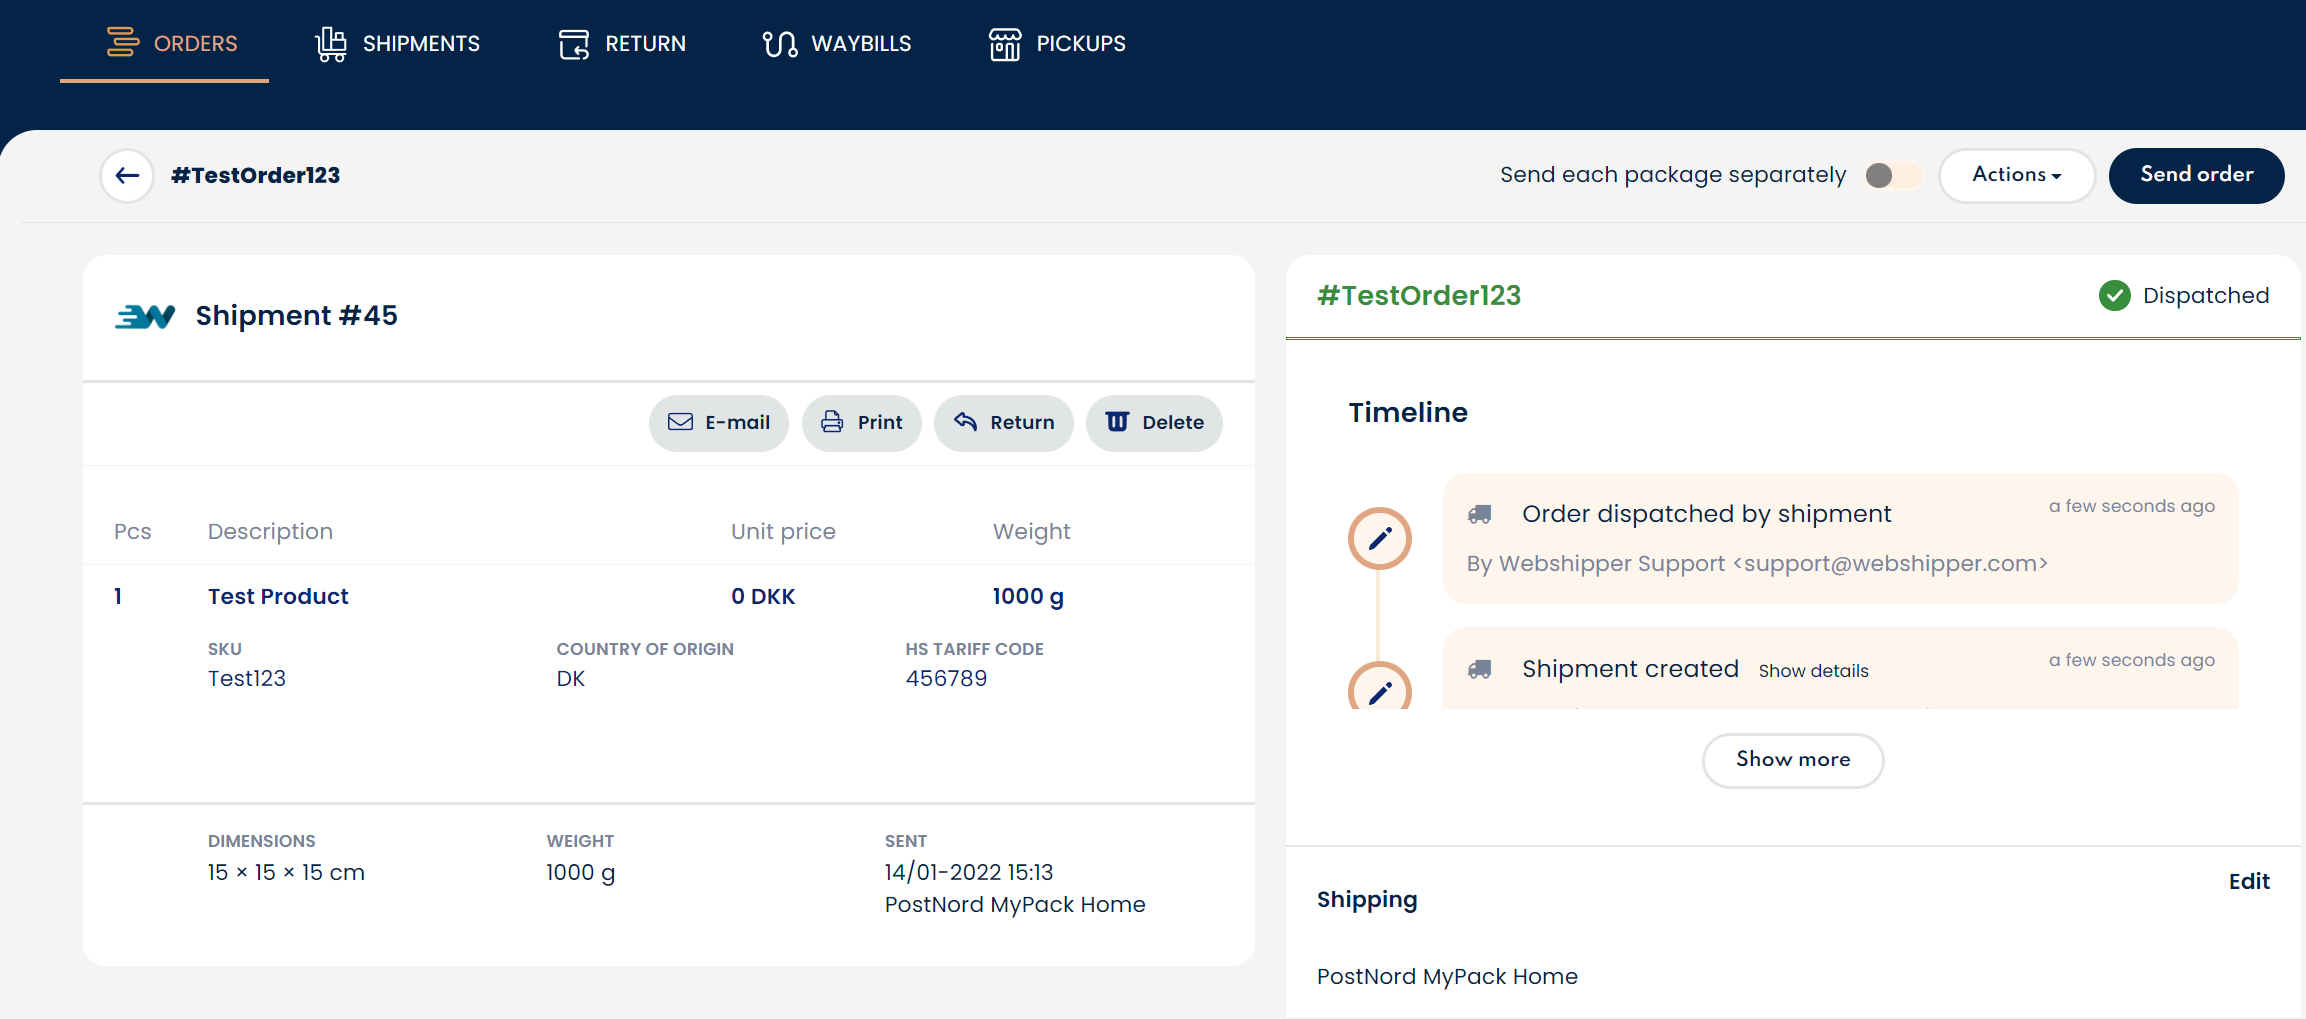
When starting in Webshipper you will find all your orders in the order list. From the list, you can click on any given order and see the selected order details. It should look as in the example below.
From here you can click actions and do pretty much anything with your order. You can also click Send Order and the order will then be processed.

When the order is sent, tracking emails will be sent, labels generated and automatic fulfillment (if enabled) will be executed. The status will also change to Dispatched and a shipment ID will now appear. If you click on the Shipment ID you will be directed to your specific shipment ID.
Note: An order can have multiple shipments.
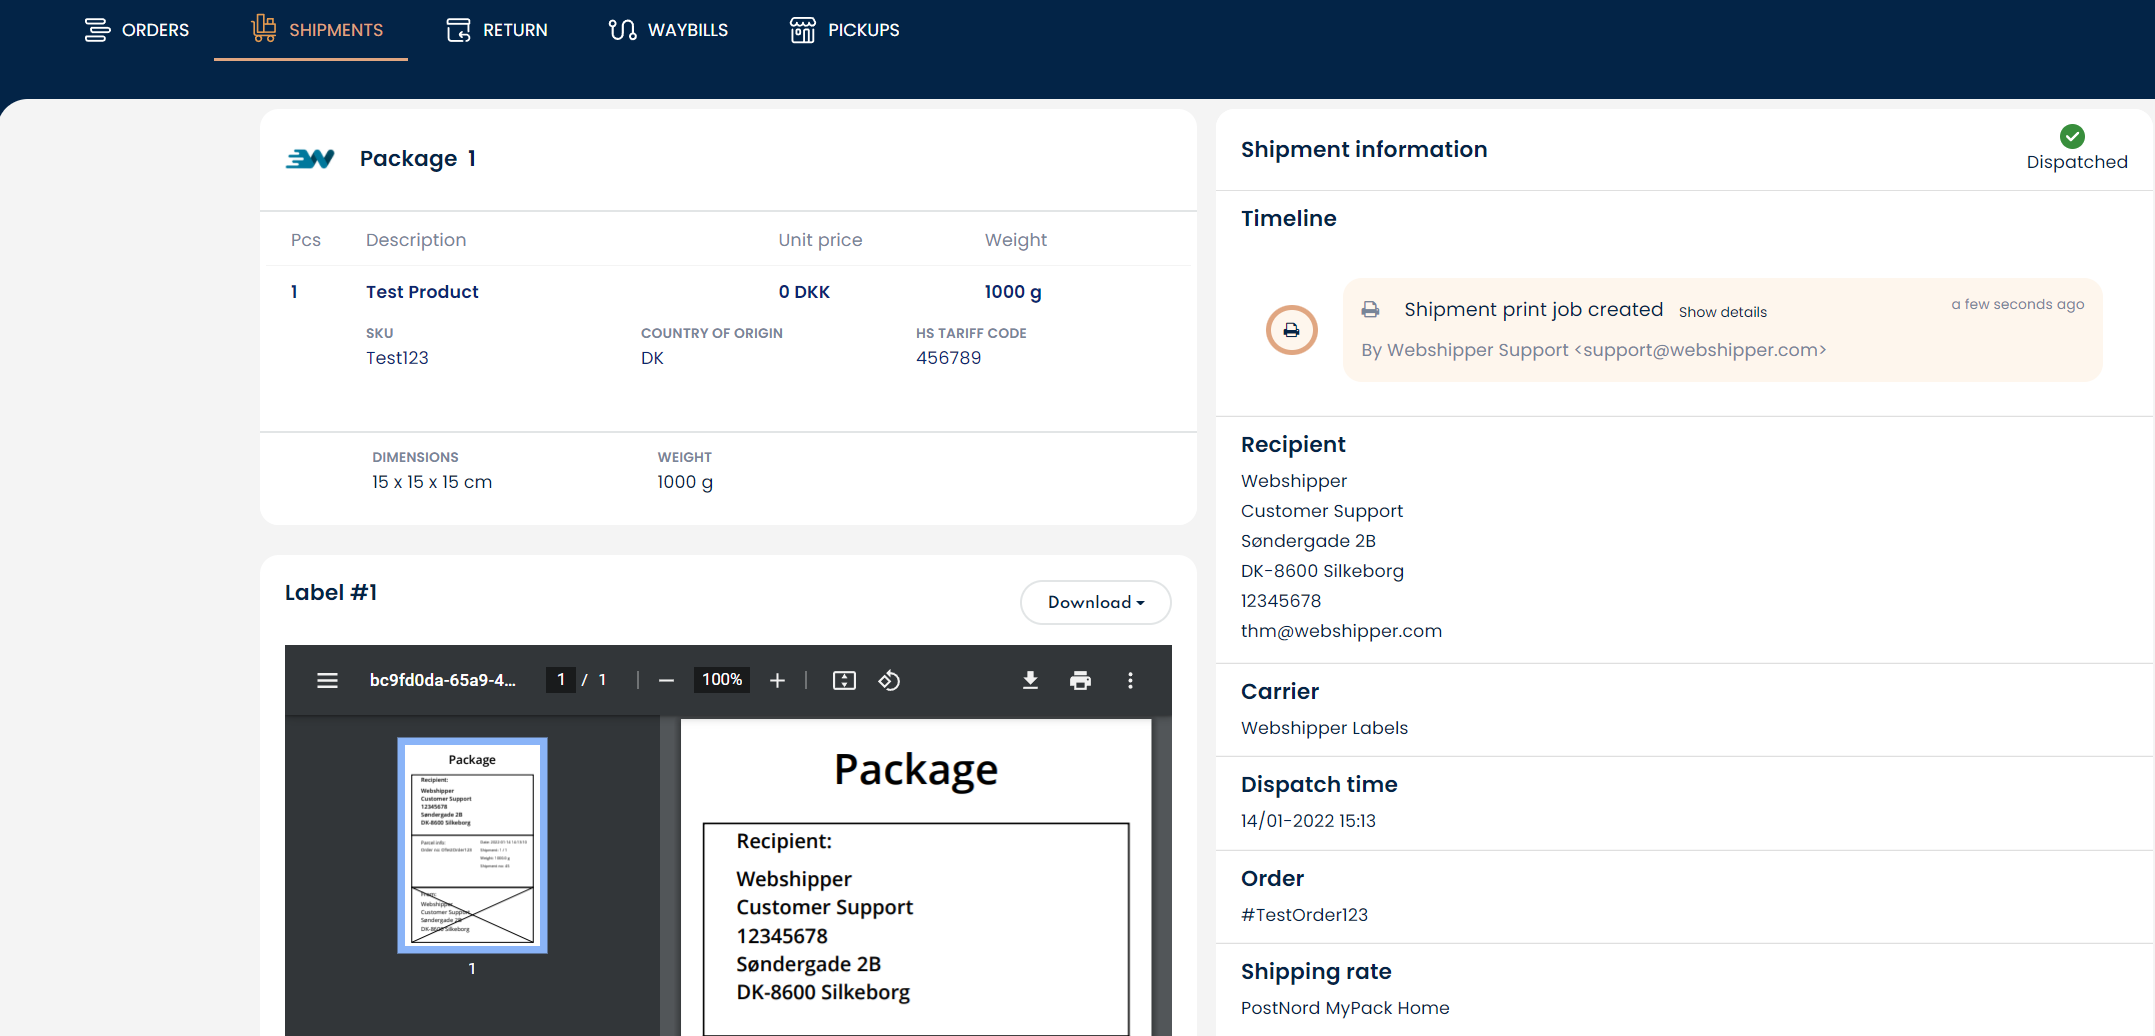
In the shipment view, you can see the shipment details, download and/or print the label, create a return shipment or delete the shipment. However, it is important to note that if you delete a shipment, this may not delete the shipment from the carrier, depending on which carrier you have chosen.