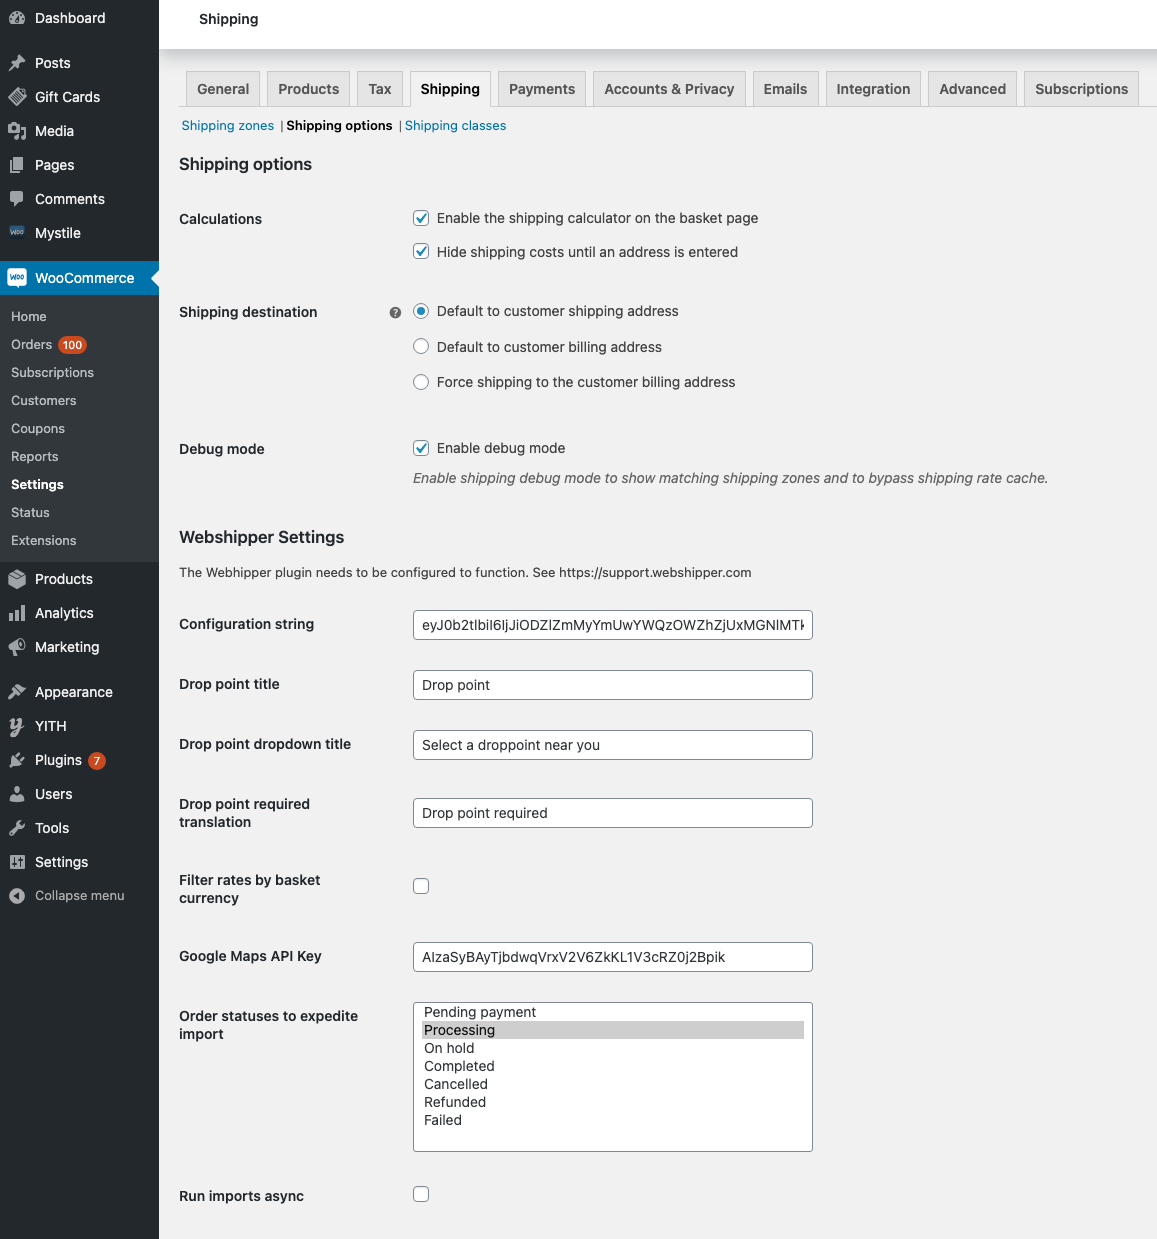
This guide will show you all the details of the Woocommerce plugin settings and what you are able to configure.
Navigate to Woocommerce > Settings > Shipping > Shipping options, to find the settings.

Woocommerce Shipping options
- The calculator must be enabled or the shipping calculator will not work in checkout.
- Choose if you wish to hide shipping costs until an address is entered.

- Set a default shipping destination.

- Enable debug to see logs and avoid cache issues.

Webshipper Settings
- For the Webshipper rates to function, you will need to enter your configuration string from the specific order channel inside your Webshipper account.

- Customize your drop-down drop point selector if used in the current theme.


- Filter rates in checkout based on shop currency. Useful for multi-currency shops. If you check this box, it will only display Webshipper rates that match the same currency as the one defined in checkout.

- If you have created a google maps API key, you can enter it here to display a map locator for drop points. Click here to see how to create your google maps API key.

- Define on which status your orders should be imported to Webshipper in.

- Check run imports async if you do not wish for orders to be imported instantly. This will enable a background service that will ensure the orders will be imported when the shop has the time for it.

- Overwrite billing address with drop point address. In general, keep this unchecked to avoid issues with your carrier.

- Disable rate quotes for testing purposes only.

