When sending packages outside the EU, specific information is required.
For instance, you need to indicate the Country of Origin and the Tarif Number.
Doing that manually for all your shipments can be a hassle, so let me show you how to set it up once, and have it transferred to Webshipper automatically.
3. Setup your Webshipper to receive the custom data
4. Add the custom attributes to your parcel slip template
1. Create an Attribute
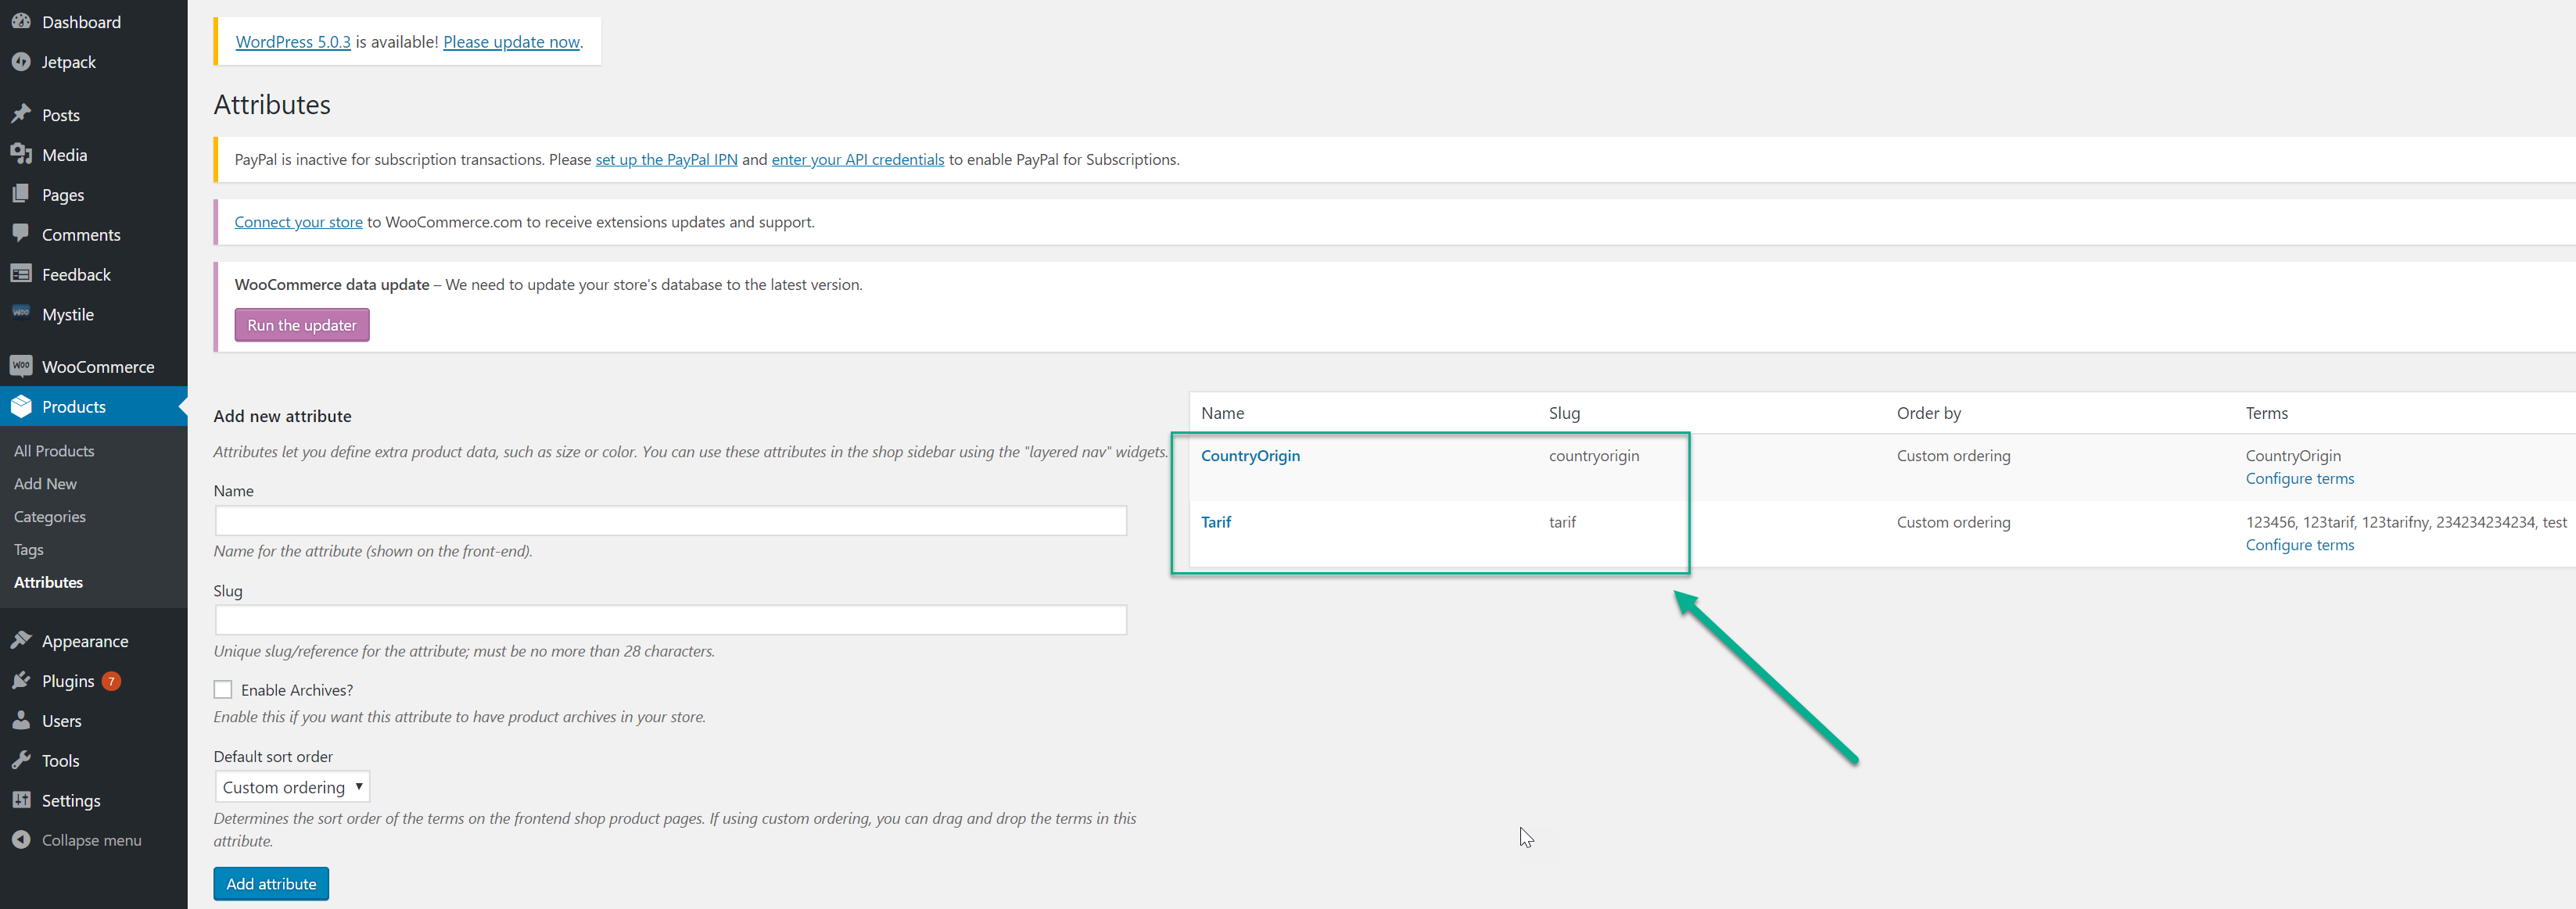
In WooCommerce you should navigate to Products > Attributes.
Inside the menu, you need to set up two new custom attributes called CountryOrigin and Tarif (important that the names are spelled identically to this guide), so it ends up looking something like this:
2. Add attributes to products
Once you have created your attributes, these new custom fields will appear on your products.
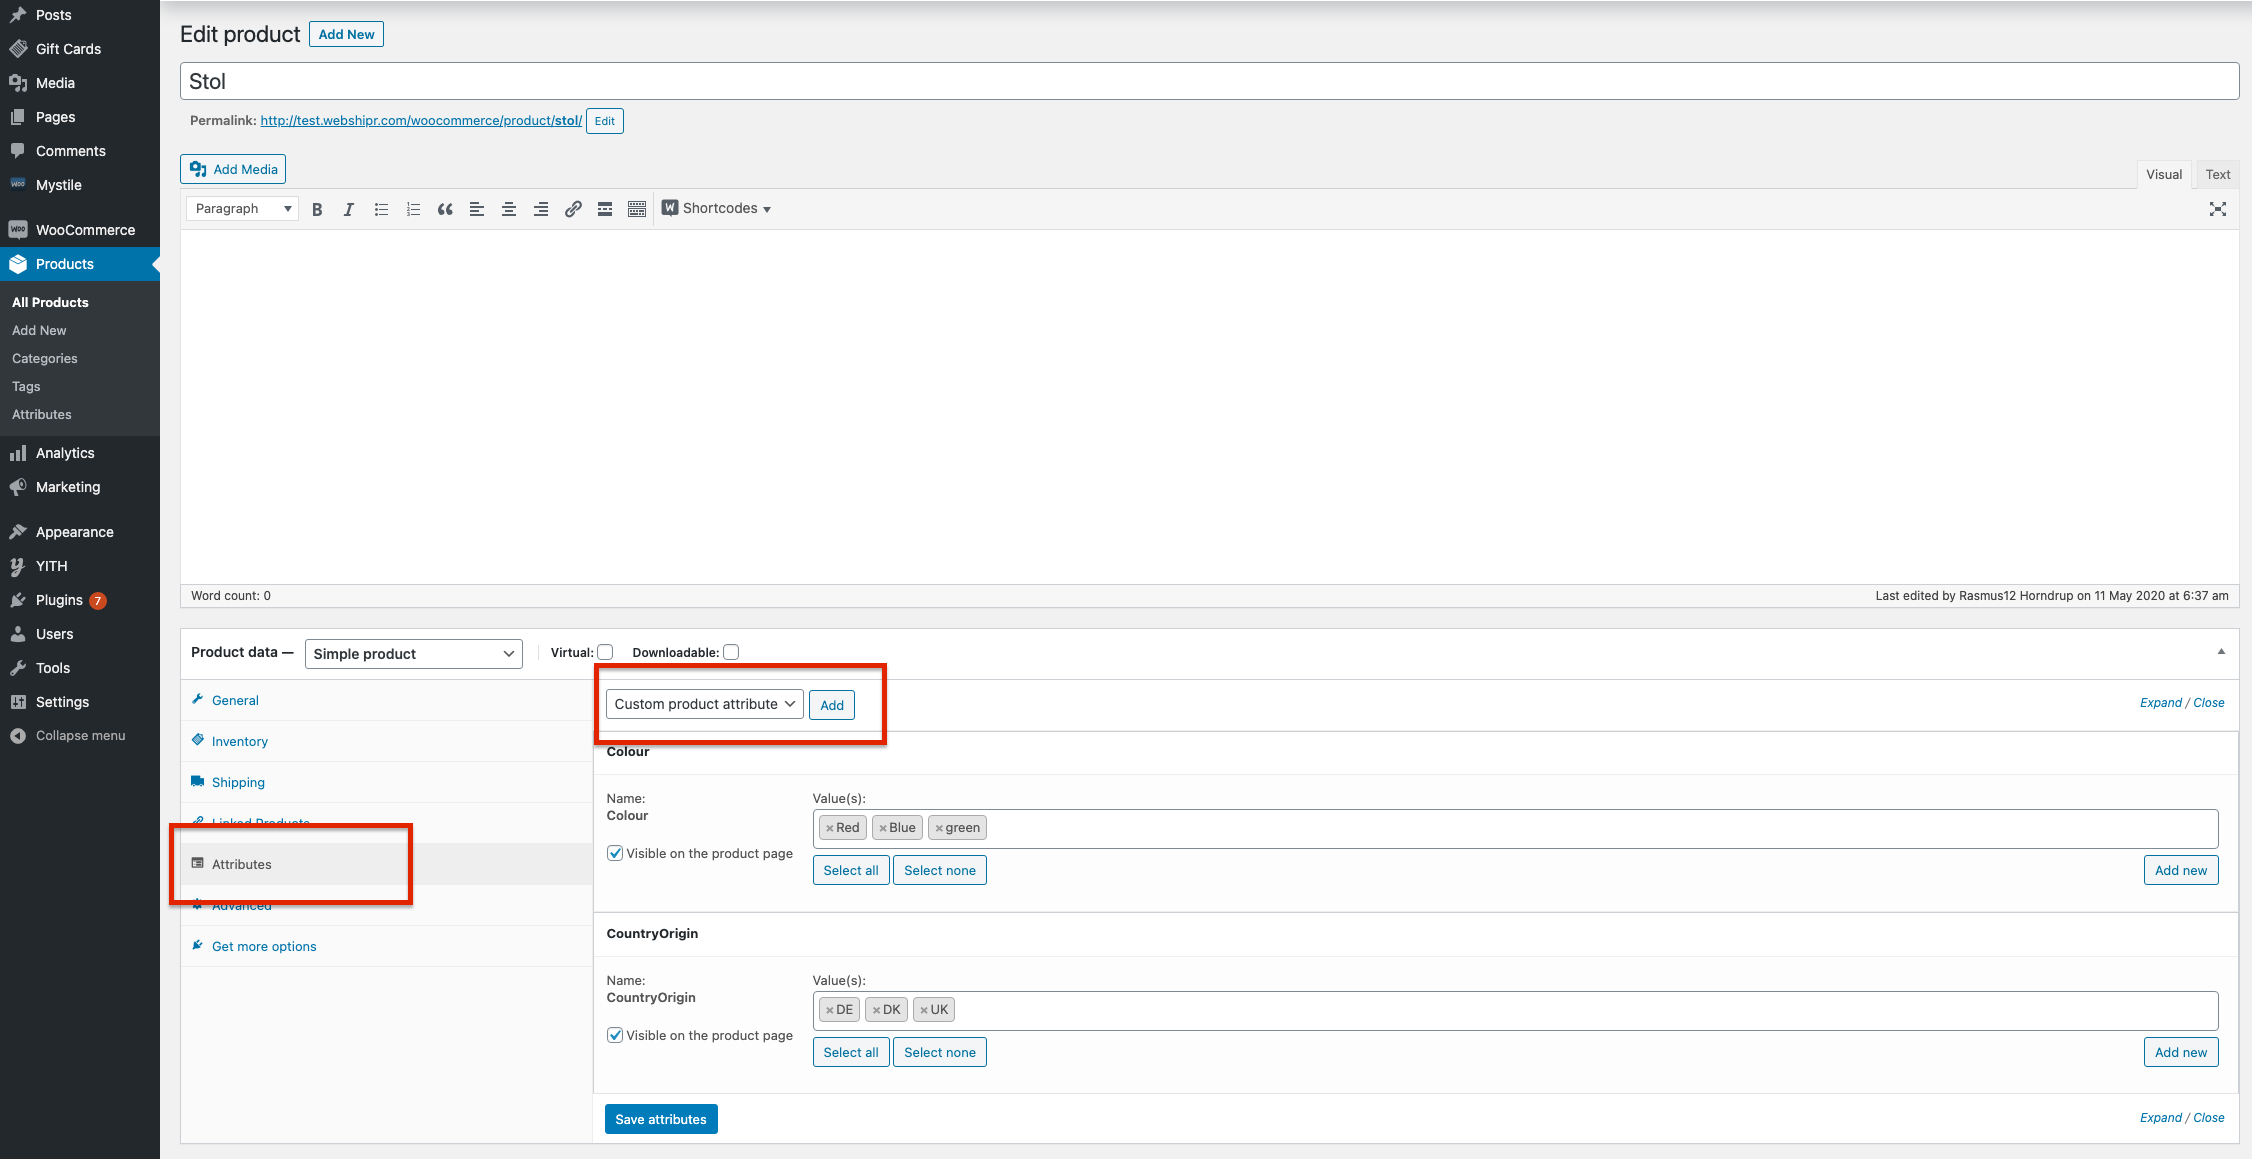
To fill it in, go to Products > All Products > Select a product and scroll to the bottom of the screen.
Select attributes in the left side menu and select the attribute you would like to add to the product.
Once the attribute is added, click Add New in the far right side to add values to your attribute.
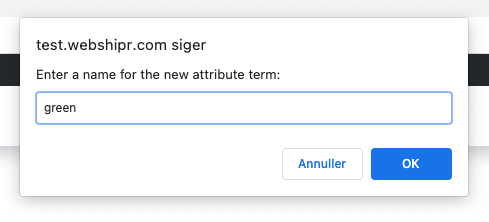
This will trigger a popup for you where you can add the specific value you need.

Once the value has been added to a product, it will be visible in a dropdown menu on all other products and will not need to be created again.
3. Setup your Webshipper to receive the custom data
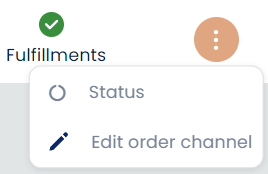
Finally, navigate to your Webshipper account and click Connect Order channels Select your order channel Edit order channel in the top right corner.

In the order channel settings, you will need to enter the values you created in Woocommerce and thereby tell the system which custom data you would like to import other than the regular order data.
It is important to write the attribute(s) exactly as they are set up in WooCommerce - upper/lower case included.

You can import additional attributes as items on the products but also as order-specific attributes.
When the information is filled in, Webshipper will automatically transfer it along with the product on all new orders.
NOTE: It is also possible to manually add the information in Webshipper by selecting the Order Actions Edit Order and scrolling down to the order lines.
4. Add the custom attributes to your parcel slip template
Read here how to add attributes to your parcel slip


