1. Add Filter in Your Order Overview
You might want to sort your orders in different ways in order to make your work routine in Webshipper more effective.
For example, you would like to quickly be able to see which orders have an error, which orders have been shipped with a certain carrier, or you would like only to see orders from a specific order channel.
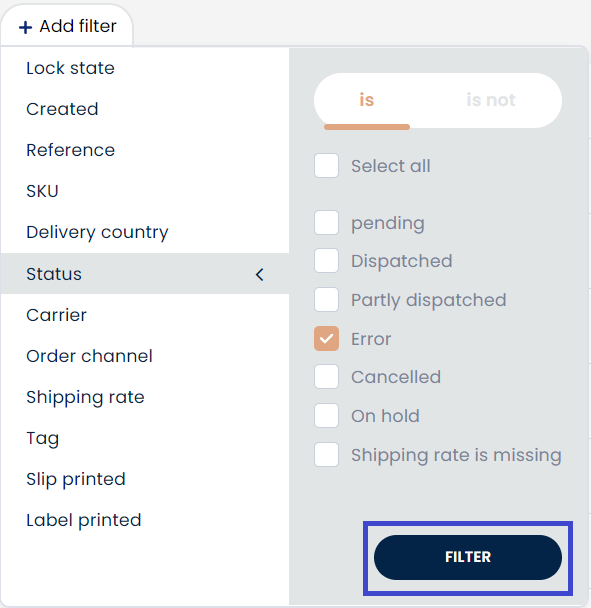
Navigate to your order overview in Webshipper and press Add filter.

A window will pop up allowing you to create your filter.
In this example, we want a filter that only displays orders with an error.
Click Filter.

You are now able to see all orders with the filter you just created.
2. Save Your Filter
If you want to save the filter in order to quickly find the same orders again click Save as tab.

Afterward, you will be asked to give your filter a name.
Type in a name and click Save.
Congratulations! You have now created your first saved filter!
3. Delete filter tab
If you at one point want to delete your filter again, simply go to your filter and click Delete tab.

